
Top 10 of the Best Compressor Plugins for Pro Tools in 2018
Tony Visconti, the producer of David Bowie amongst others, has once said that compression is the sound of rock’n roll. It’s not hard to see why when you look at the artistic implications of this technology. But what does a compressor actually do to sound? In short, a compressor is a device that receives an audio signal, compares it to a threshold and reduces the gain of every peak of the incoming signal that exceeds that threshold.
There are many types of compressors but in essence they all do the same thing – they lower the dynamic range (the “distance” between the lowest amplitude of the signal and the highest) of a signal in order to make that signal more easy to control. So what would be an application of a compressor in mixing? There’s endless applications for using a compressor but some of the most usual are things like controlling the dynamic range of a vocal, so that you can easily integrate it in a mix, flattening the decay, sustain and release of a kick drum or snare in order to emphasize the attack or flattening out a bass performance that has spurious peaks.
Standard Compressor Parameters
Most compressor plugins out there are emulations of hardware devices but lately more and more innovative plug-in designs are coming out that go beyond just simulating a hardware device and have all sorts of features that are impossible to implement in analog circuitry. Nevertheless all compressors, virtual or hardware, share about the same set of parameters. Let’s take a look at the basic parameters found on most compressor units:
Threshold
 The threshold parameter is one of the most important ones. This is the control that let’s the user decide upon a limit, usually in decibels, above which the signal will be reduced in gain. For example if the threshold of a compressor is set at -30 dB all the peaks of the signals that exceed -30 dB will be reduced in gain according to the gain reduction ratio.
Ratio
Ratio is the parameter which lets the user decide how much gain reduction the compressor will apply to the signal. It is called ratio because it is expressed as a division between the amount of dB that the incoming signal is over the threshold and the amount of dB over the threshold the signal coming out of the compressor is. For example, if the ratio of a compressor is set at 2:1 and the incoming signal is 4 dB over the threshold the signal coming out of the compressor will be 2 dB over the threshold. (as 4:2 = 2)
Make-Up Gain
This parameter enables the user to amplify the signal that is coming out of the compressor in order to match the incoming level and make up for the gain reduction applied by the compressor. Why would you do that, some may ask? Because, in order to flatten out the dynamic range you need to reduce the gain of the spurious peaks, but by doing so you also reduce the average level of the signal; thus, by applying make-up gain you get a flatter signal coming out of the compressor that has the same amplitude as the incoming signal.
Attack & Release
These are separate parameters but I will explain them together as they serve similar purposes. The attack parameter controls the amount of time, usually in milliseconds, after which the compressor starts applying gain reduction after it detects a peak exceeding the threshold. Similarly, the release sets the amount of time, also in milliseconds, after which the compressor stops applying gain reduction after the initial detection of a peak.
Knee
The kn ee parameter controls how quickly the ratio gets to the set level after a signal exceeds the threshold. Per short, it controls the response curve of the ratio parameter. For example, let’s imagine a ratio set at 8:1. After the compressor detects a peak exceeding the threshold the ratio will increase rapidly from 1:1 to 8:1. In the case of a soft knee, the ratio will increase slower.
Applications of Compressor Plugins
There are many types of situations in which compressors come in extremely handy. From treating tracks directly via an insert to controlling the dynamic of entire mixes, compression is truly one of the most useful mixing tools. Let’s take a look at some of the most common ways compression can be handy:
Serial Compression
Serial compression, as the name suggests, means adding a compressor in-line with the flow of signal towards the fader. This is the most common way to use a compressor. You can use it this with bass, vocals, drums, guitars and anything else that ever needs it.
Parallel Compression
This kind of compression is set up by creating an auxiliary track and inserting a compressor onto it. Then, from a track or multiple tracks you create sends towards the auxiliary track and via the send fader you can control the mix between the dry signal and the compressed signal. This kind of compression is common for drums, vocals or whole collections of instruments in the mix and is commonly used in conjunction with serial compression to add weight and character to instruments.
Mix Bus Compression
This is a general compression which is applied on the whole mix by inserting a compressor on the master fader track. Engineers use such compression to flatten out some of the exaggerated peaks of the mix or to flatten the dynamic range of the mix and “glue” things together.
Sidechain Compression
This type of compression employs signals from two different tracks. Basically, when you apply this kind of compression to a track gain reduction is applied every time a signal from another track (also called key signal) exceeds a certain threshold. A common use is, for example, compressing a bass track using a key signal from the kick drum. In this set up the engineer can use the compressor so that every time the kick strikes the bass gets a certain amount of dB gain reduction thus letting the kick cut better through the mix.
Check out our detailed tutorial on sidechain compression and also more details about compression, in general.
Best Compressor Plugins for Pro Tools
Now that we have a better idea about what a compressor does and how we may use it lets take a look at some of the best compressor plugins for Pro Tools out there:
Waves SSL G-Master Buss Compressor
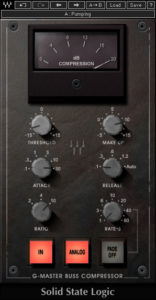
This one is an emulation of the master buss compressor on the amazing SSL 4000 G console. It makes an excellent option for you mix bus (master fader) and it sounds excellent as the “glue” to your mix. There is no surprise in the layout of the compressor – it has all the standard parameters. The Rate-s parameter is just another name for knee. A cool feature is that you can set it to auto and let the compressor decide how fast the ratio increases and decreases.
Universal Audio Teletronix LA-2A Classic Leveler Collection

This is another great emulation of a vintage analog hardware compressor – the Teletronix LA-2A. It is a wonderful emulation of the real thing and the sound gets ridiculously close to the real thing considering how much cheaper buying the plug-in is compared to the hardware version. It has an embedded attack and release time, both quite slow, and as it only has two main parameters, gain and gain reduction, I am sure you will not get lost with this great sounding software.
Klanghelm MJUC

This is one of my personal favorites for two reasons – the amazing sound and the crazy cheap price tag. It is not an emulation of a certain hardware compressor but more a collection of features that the developer liked in different hardware compressors. It has three different skins and it is basically three different compressors in one, each having a distinct coloration to it. What is really special is that you get some really interesting parameters that let the user add coloration and character to the sound. Price tag? 24 euros. Unbelievable.
PSP Audioware VintageWarmer2

This unit has some excellent features and an amazing, amazing sound. It is not an emulation of a specific hardware device but it is clearly modeled after some of the classics. It is pretty straight forward with the exception of the two band controls (low and high) which allow for some multi-band dynamic processing though it is not exactly a multi-band compressor. Nevertheless it allows for some cool timbre shaping that gives every track your throw it across character.
McDSP 6030 Ultimate Compressor

This is actually a whole virtual rack of ten compressors, some modeled after hardware device, some original designs by McDSP. They all sound pretty cool, especially the opto module which is an LA-2A emulation which is so good it makes me think about why Universal Audio price their iteration so high.
Cytomic The Glue

As the name suggests, it is intended to be used as a mix bus compressor as it is modeled after 80’s mix bus compressors on SSL consoles. It is very much like an original hardware device with one exception: super fast attack times of down to 0.0.1 ms. It sounds very similar to the Waves SSL Master Bus compressor but for me this one has a bit of an edge.
Softube Tube-Tech CL 1B

Another great optical compressor emulation which sounds simply amazing. You can use it for anything from gentle compression to snappy, punchy settings. I would not recommend it as a mix bus compressor but for tracks or if used as a parallel compressor it does wonders to the character of the signals being processed. What’s really cool as a feature which you do not really find on optical compressor plug-ins ( like the LA-2A) is that you can also use it as a sidechain compressor with an external key signal.
FabFilter Pro-C 2

This is one of the most innovative designs on the market. It is made to add as little coloration as possible to the sound while giving the user the best possible compression calculus via the 5 different algorithms: Vocal, Mastering, Bus, Punch and Pumping. The coolest feature in my book is the multi-band sidechain filter equalizer which let’s you shape the timbre of the compression in very cool ways.
Waves H-Comp

H-Comp combines the behavior of analog circuitry together with the power and precision that only a plugin can provide. An interesting feature for me is the release time that you can sync to the session tempo so that you can make a musical, rhythmic compression pump. Also you can set how much “Analog” sound you want which is, of course, tube coloration.
Waves Renaissance Compressor

This is my go to compressor when no other compressor does the job. I have still failed to find a context in which this device does not sound right. It is not colorful and it does not impose character on tracks but it does the job a compressor should do just right – applying gain reduction. All the parameters are fairly standard and because of the uglyish UI it is very light on the CPU.
Final Thoughts
With the sheer amount of products on the market you will probably be getting a lot of these devices as there isn’t one device that can replace all the others perfectly. Having more compressors with different designs benefits the mixing process as it lets you be more creative. I often insert 4-5 units on a track and audition them one by one and decide which is best for my purposes.
Whatever products you choose, remember that these are merely tools and knowing how to properly use them is paramount; so be sure to practice using and listening for compression before starting to shop for the compressor plugin for Pro Tools
No love for Steven Slate VMR rack compressors? FG-Stress etc..
Pro-C 2: “which let’s you shape the timbre…”
It’s “which *lets* you shape the timbre.” (No apostrophe.)
What about Klanghelm DC8C2
The stock pro tools compressor pulls through for me on most occasions.
Yes, the Dyn 3 Compressor/ Gate is a very good compressor indeed and I always find a place for it in every project – these are simply other great options out there.