
Using Playlists Within Multitrack Sessions
Introduction
When in the studio tracking a large number of microphones at one time, such as a drum kit, a session can quickly become messy an unorganised as more takes and dubs are recorded as well. Pro Tools thankfully thought ahead and offers a solution in ‘playlists’. Playlists allow you to record multiple takes on one track keeping everything clean, and a dream when it comes to combining different sections of takes to one master.
Session Set Up
I’ll start by talking about how the playlist function labels your takes, Pro Tools will add a numeric count to the end of your track name, for example if you original track was labelled ‘Guitar’, the next playlist would title the track ‘Guitar.01’ then ‘Guitar.02’ and so on…..

But hang on, isn’t your second take then going to be labelled ‘Guitar.01’? If you’re ok with this then go right on, but if you suddenly need to locate take 16, wouldn’t it make more sense to look for ‘Guitar.16’? This can be achieved by labelling the original track ‘Guitar.01’ from which Pro Tools will increase the number per each additional take, makes sense to hold this habit when creating and labelling your sessions.
Creating Groups
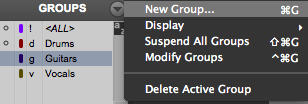
So when we are working with a number of tracks together such as drums, we will be wanting to create new playlists for them all at once, that can be done using track groups, if you are new to track grouping you can learn about them in our tutorial here .
While making sure a track group is active, creating a new playlist on one of the tracks will do the same across all others associated with it.
This isn’t limited to just the one instrument, if you are a recording situation where the drummer, bassist and keyboard player are all recording together then why not create a group consisting of those all together, that way you again can create a new playlist on one of the tracks and all instrumentalists will have a fresh playlist available for the next take within a matter of seconds, a great way to remain efficient within tight studio times!
Creating New Playlists
So we’ve spoken about how Pro Tools will label your playlists as well as how they can benefit your sessions, so now lets actually look at you work with them!
After recording your first take on a track you have hopefully labelled with the extension ‘.01’, you will need to create a new playlist to hold the next take. Click on the drop down arrow on the right hand side of the track title and select ‘New’ to create a new playlist, this will create a new playlist with ‘.02’ at the end of your track title. You are now ready to hit record and go again for your next recording with all of your inputs and output kept in place as before. Great!

Choosing Takes and Comping
So after a number of takes within a number of different playlists you are sure you have everything you need in there and now need to look at placing the best bits together to create your ‘master’ take or ‘comping’ as it is more commonly known in the industry.
We can start by displaying all of our playlist takes in the edit window by changing the track view to ‘playlists’. You can now audition takes individually by soloing each playlist using the solo button on the left hand side of the playlist.
Comping is made very simple thanks to some handy shortcuts, once you have auditioned and found a section you like you can highlight it and move it to the main playlist by using the shortcut Control+Option_V. Do this across all of your takes and you will quickly have a take in your main playlist made up of all your best performances!

Wow! Cmd + Ctrl + V is an amazing shortcut! Wish I’d known about it sooner. Thanks! Keep up the good work! This site is amazing!
Hi Seth,
It certainly is a very useful shortcut to have when working with lots of takes in one go!
Glad you like the site we try and add new things to learn as often as we can!